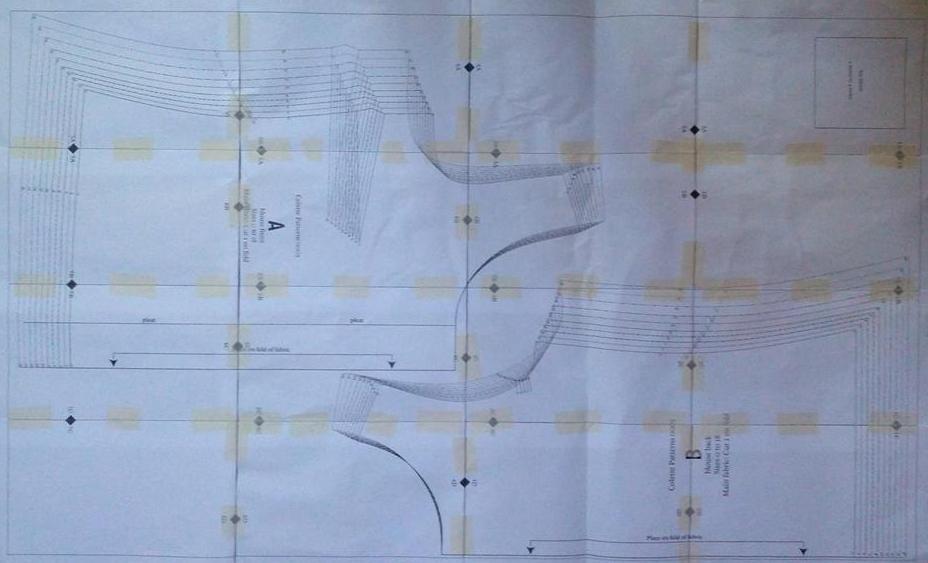
Taped up downloaded Sorbetto pattern
So let's get to the details! I patch-worked the print-at-home pattern and traced it off onto pattern paper. Then it took quite a few pattern alterations to get it to fit well, so I thought I'd detail the pattern for anyone else wanting to learn to alter to fit themselves better.
Sorbetto Pattern Alterations
Based on initial measurements of the pattern, I realised that the top would be way too short for me. I started by extending the length of the of the bodice in two places - at the notch by 9 cm and then at the hem for another 2 cm, giving me a total of 11 cm extra (see, way too short!)
I then looked at the width and identified the need for an FBA, before sewing up my first toile. When I made this up in my first fashion fabric, I decided to add some subtle waist-shaping that is also shown below.
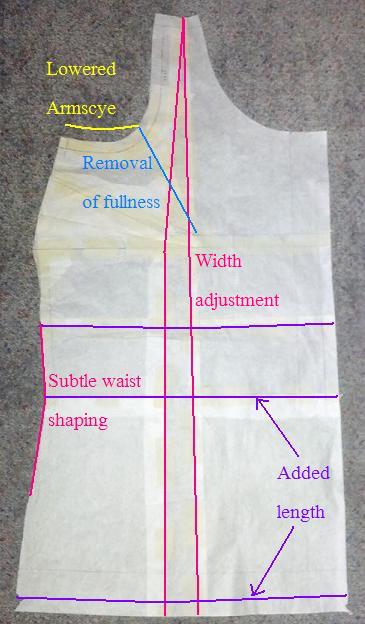
The first fitting highlighted the need to make a few more changes - I extended and increased the size of the dart to remove some more fullness and identified the need to alter the back as well to remove a little fullness, so I introduced a centre back seam. This made it much easier to remove this fullness.
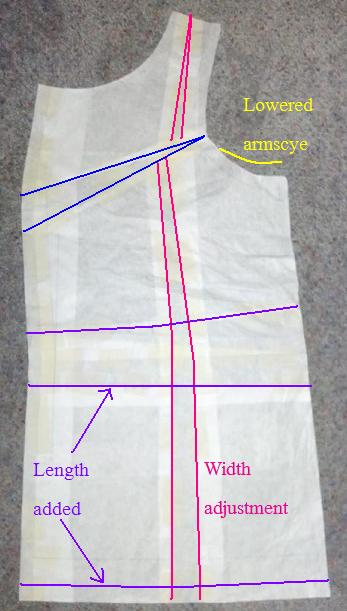
Front and Back adjustments
The first fitting highlighted the need to make a few more changes - I extended and increased the size of the dart to remove some more fullness and identified the need to alter the back as well to remove a little fullness, so I introduced a centre back seam. This made it much easier to remove this fullness.
I also lowered the sleeve, as I was finding it was cutting into my underarm a little. It was only slight but still worth the adjustment.
In the second toile, I decided to drop the position of the dart as it was sitting slightly too high on me. I only dropped it by about 1-1.5cms, keeping the angle the same.
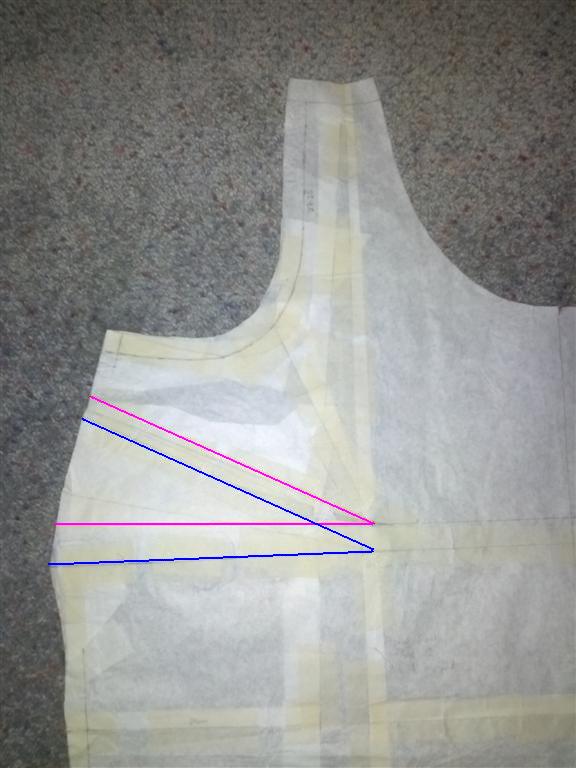
Shifted dart down (pink is the original placement, blue is the new placement)
Sleeve Pattern Alterations
I decided to make my first version with sleeves, using the free sleeve pattern made by Mena at Sew Weekly and then updated by Sew, Incidentally).
I measured the sleeve against my altered Sorbetto and realised that it was too small, so I assume the free pattern was for a smaller Sorbetto size. So I did a bit of slashin' and spreadin' to make the sleeve the right size.
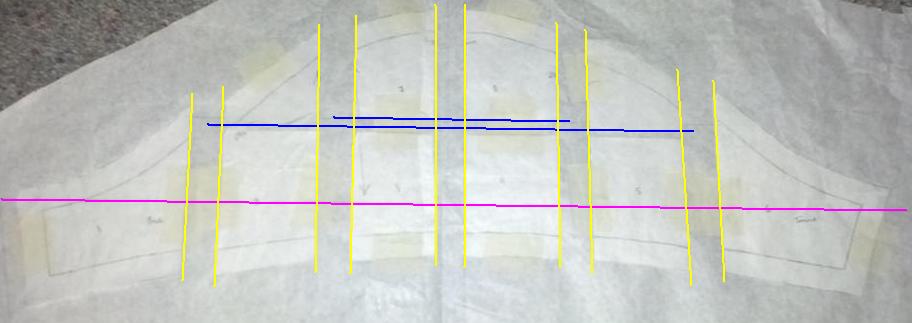
In the image below, you can see the method I used. I marked the lines on the pattern to show where I wanted to cut the sleeve up and number each piece so I wouldn't get confused. I then marked a line on another piece of paper (pink line) and used this to line up the lines. I then split the sleeve up by 1 cm in 5 places, as per the yellow lines, based on the amount of additional sleeve I needed to fit the bodice of my pattern. In order to ensure the sleeve head was still well-shaped, I raised the middle sections by either .5 or 1 cm. Once I had the graded sleeve, I re-traced this onto another piece of pattern paper. I smoothed the edges out as I retraced and then re-confirmed that the sleeve would fit correctly.
When I made up my second toile, I found that the sleeve kind of stuck out (like little wings!), so I pinned out the fullness in a couple of places. I then transferred the changes to the pattern and started cutting out my real fabric!


In the image below, you can see the method I used. I marked the lines on the pattern to show where I wanted to cut the sleeve up and number each piece so I wouldn't get confused. I then marked a line on another piece of paper (pink line) and used this to line up the lines. I then split the sleeve up by 1 cm in 5 places, as per the yellow lines, based on the amount of additional sleeve I needed to fit the bodice of my pattern. In order to ensure the sleeve head was still well-shaped, I raised the middle sections by either .5 or 1 cm. Once I had the graded sleeve, I re-traced this onto another piece of pattern paper. I smoothed the edges out as I retraced and then re-confirmed that the sleeve would fit correctly.
Sleeve adjustments
Final sleeve, showing removed fullness
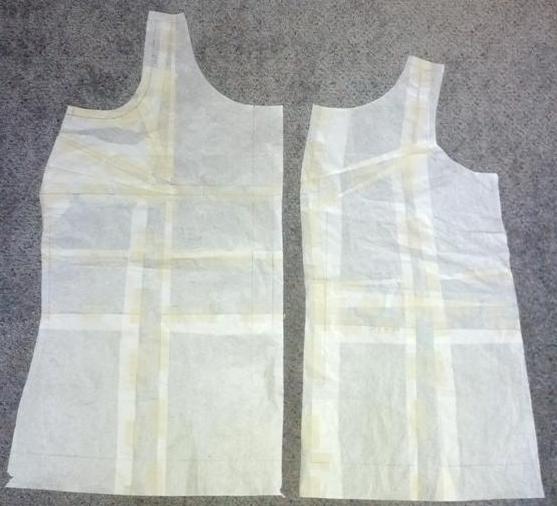
Final patterns with all adjustments
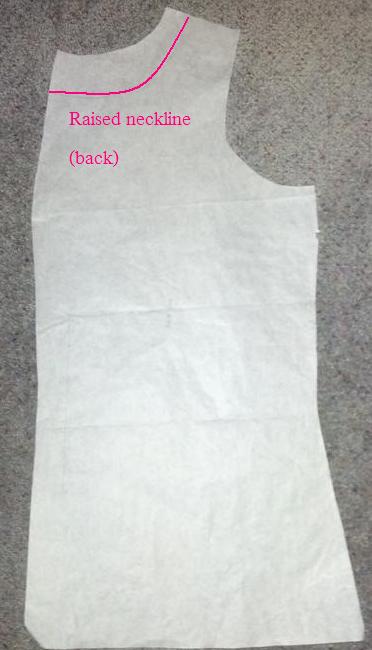
Once I'd made this up in my first fashion fabric, I found that the neckline was wider than I liked and also lower at the back than I would prefer for work tops. So for my second version, I altered the neckline by raising it at the back by 5 cm and at the shoulders by 2 cm. I didn't alter the front neckline at all, as this was perfect already!
Neckline alterations (front and back)
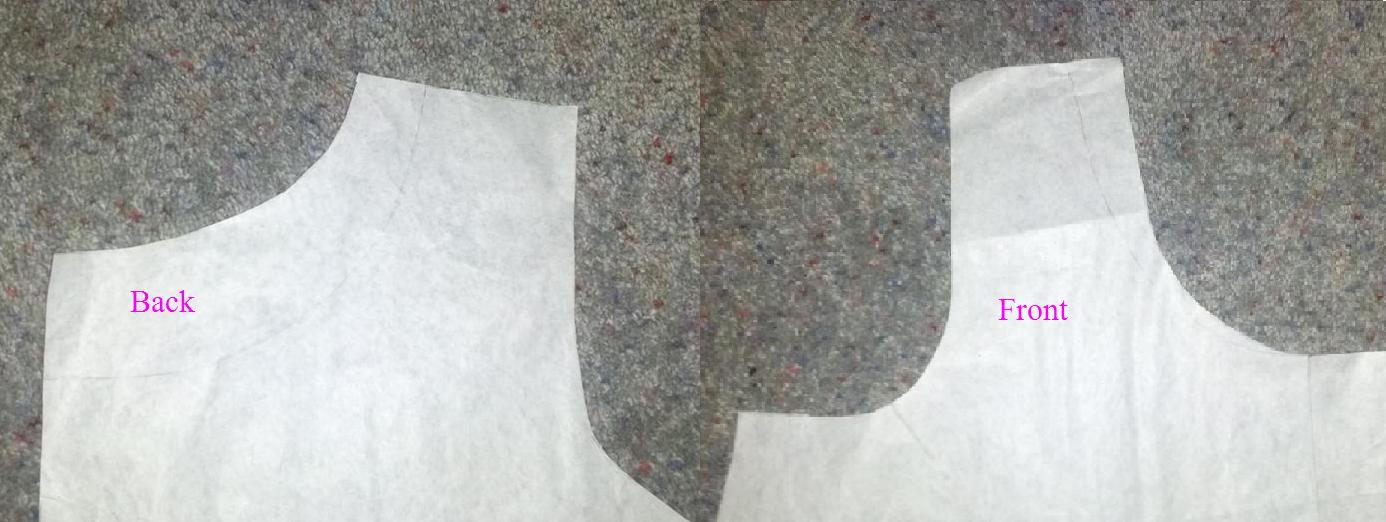
Neckline alterations close up
Finished tops to follow shortly :)
Look forward to seeing it! I'm in awe of your pattern modification knowledge - really cool!
ReplyDeleteI wish I could claim it was all my knowledge but I had help in sewing class. I'm trying to document it as I go so that I remember what I've learnt and hopefully can help other people out in the process.
DeleteGreat post...the details are very helpful!
ReplyDeleteI just finished sewing up my own failure of a Sorbetto. I think I'll just move on since I have a few other projects that I'm more inspired about right now. Too bad...I have a length of a really nice silk cotton blend that needs to get used up!
I say persevere with it! Once you have the fit down pat, you can make small alterations to make so many different variations.
Deletethis is great! thank you for sharing!! I haven't even bothered with the sorbetto sleeve because I didn't know where to start on the alterations.
ReplyDeleteI know what you mean and I got help in altering mine :) I hope that it helps you to add sleeves, as it makes it a great work top. Good luck :)
DeleteI look forward to seeing your personalised Sorbettos - going through this process is so worthwhile!
ReplyDeleteI finally posted some photos of the first two today and my next too are starting to take shape. I'm pretty excited by them!!
Delete