Showing posts with label Colette Patterns. Show all posts

Sunday, February 10, 2013

It's raining Sorbettos!

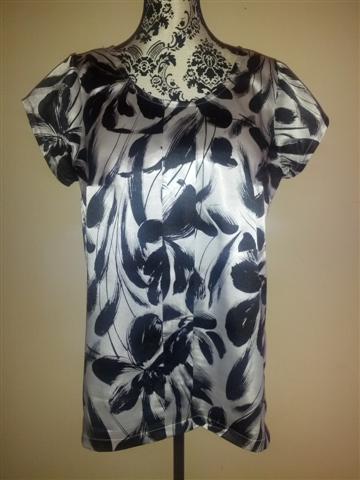
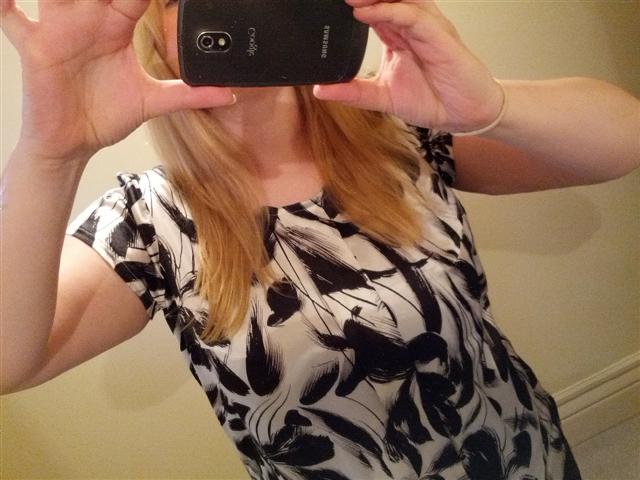
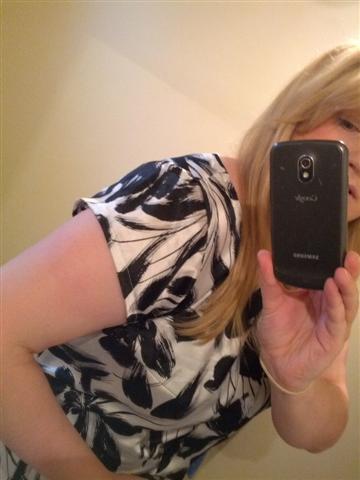
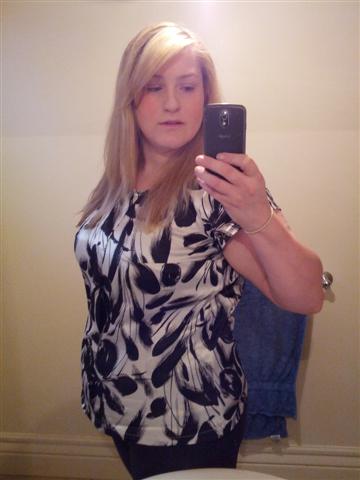
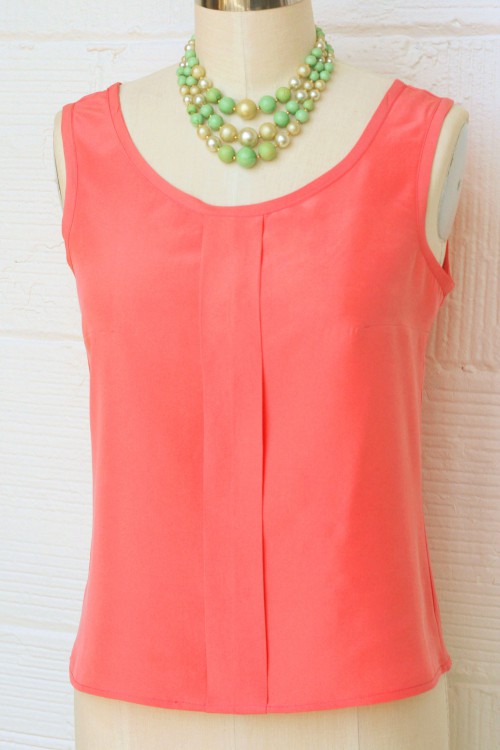
Here they are finally ... my Sorbettos! I'm still trying to work out the best way to take photos of them, since I have a tripod but no real camera and getting someone to take them when the sun's up is proving challenging! I thought I'd try a few options and whilst they aren't great, they are confirming that I need to buy a real camera! At least, that's the excuse I'm going to use ;)

 On my display only dressform (i.e. not my shape at all!)
 
Love the pleat down the front!
 
Pretty sleeves :)
 
Check out that concentration!


Monday, January 7, 2013

Sorbetto Pattern Adjustments


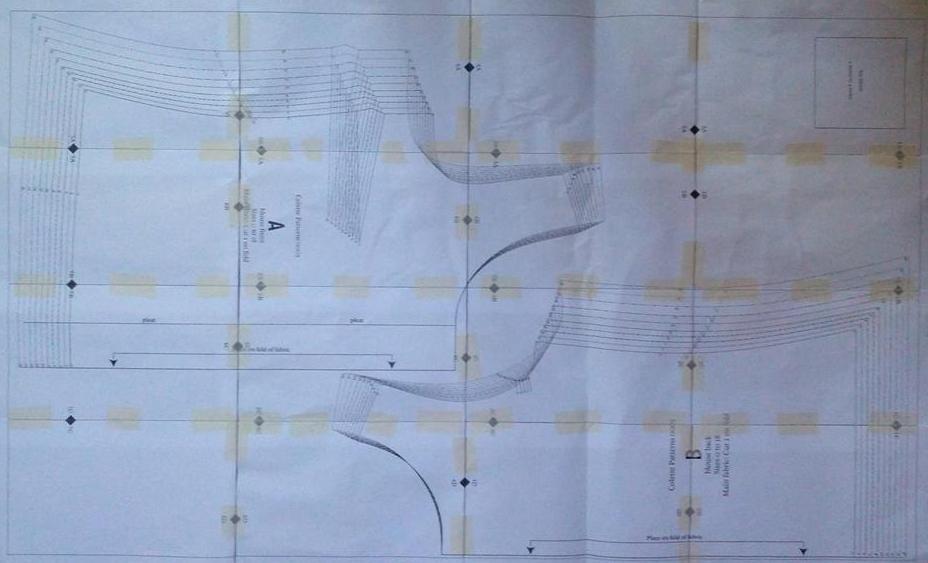
Taped up downloaded Sorbetto pattern

So let's get to the details! I patch-worked the print-at-home pattern and traced it off onto pattern paper. Then it took quite a few pattern alterations to get it to fit well, so I thought I'd detail the pattern for anyone else wanting to learn to alter to fit themselves better.

Sorbetto Pattern Alterations
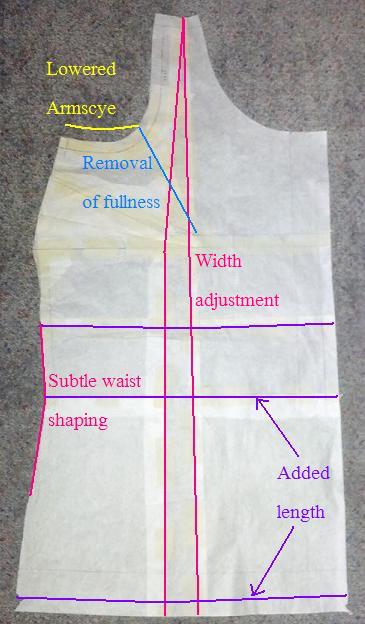
Based on initial measurements of the pattern, I realised that the top would be way too short for me. I started by extending the length of the of the bodice in two places - at the notch by 9 cm and then at the hem for another 2 cm, giving me a total of 11 cm extra (see, way too short!)

I then looked at the width and identified the need for an FBA, before sewing up my first toile. When I made this up in my first fashion fabric, I decided to add some subtle waist-shaping that is also shown below.

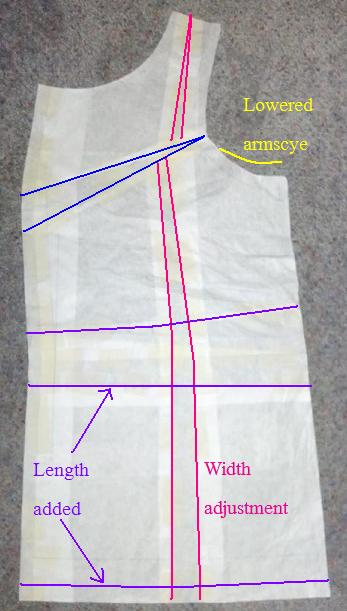
Front and Back adjustments

The first fitting highlighted the need to make a few more changes - I extended and increased the size of the dart to remove some more fullness and identified the need to alter the back as well to remove a little fullness, so I introduced a centre back seam. This made it much easier to remove this fullness.

I also lowered the sleeve, as I was finding it was cutting into my underarm a little. It was only slight but still worth the adjustment.

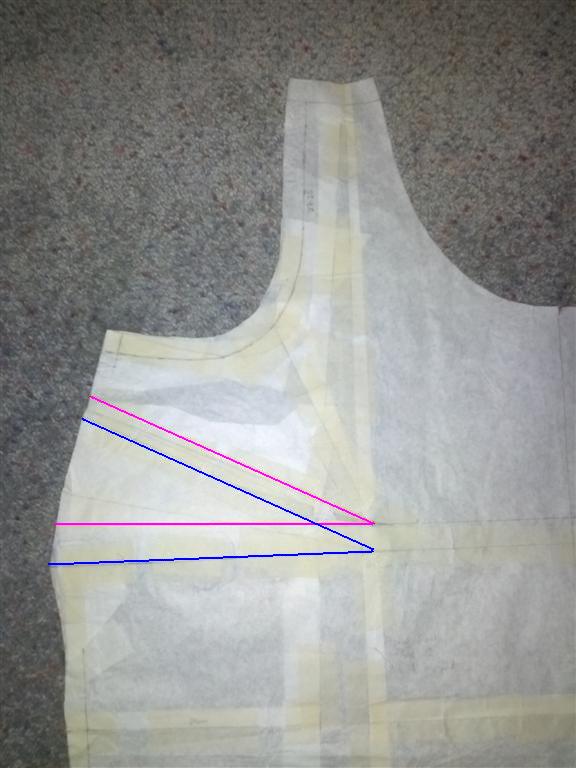
In the second toile, I decided to drop the position of the dart as it was sitting slightly too high on me. I only dropped it by about 1-1.5cms, keeping the angle the same.

Shifted dart down (pink is the original placement, blue is the new placement)

Sleeve Pattern Alterations
I decided to make my first version with sleeves, using the free sleeve pattern made by Mena at Sew Weekly and then updated by Sew, Incidentally).

I measured the sleeve against my altered Sorbetto and realised that it was too small, so I assume the free pattern was for a smaller Sorbetto size. So I did a bit of slashin' and spreadin' to make the sleeve the right size.

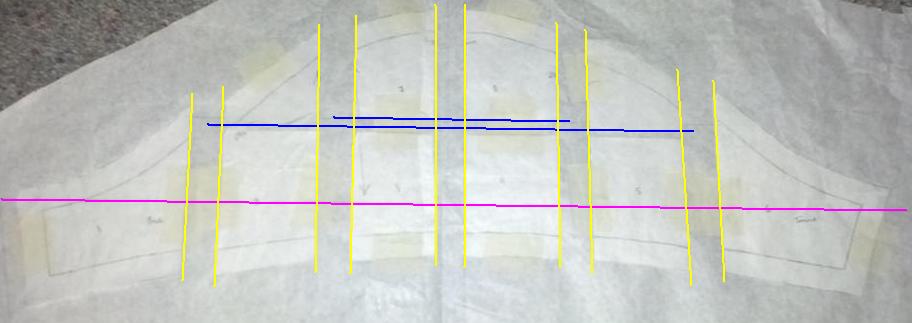
In the image below, you can see the method I used. I marked the lines on the pattern to show where I wanted to cut the sleeve up and number each piece so I wouldn't get confused. I then marked a line on another piece of paper (pink line) and used this to line up the lines. I then split the sleeve up by 1 cm in 5 places, as per the yellow lines, based on the amount of additional sleeve I needed to fit the bodice of my pattern. In order to ensure the sleeve head was still well-shaped, I raised the middle sections by either .5 or 1 cm. Once I had the graded sleeve, I re-traced this onto another piece of pattern paper. I smoothed the edges out as I retraced and then re-confirmed that the sleeve would fit correctly.

Sleeve adjustments

When I made up my second toile, I found that the sleeve kind of stuck out (like little wings!), so I pinned out the fullness in a couple of places. I then transferred the changes to the pattern and started cutting out my real fabric!

Final sleeve, showing removed fullness

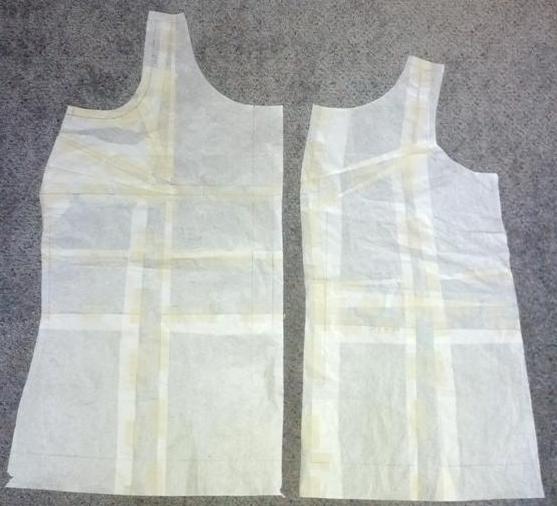
Final patterns with all adjustments

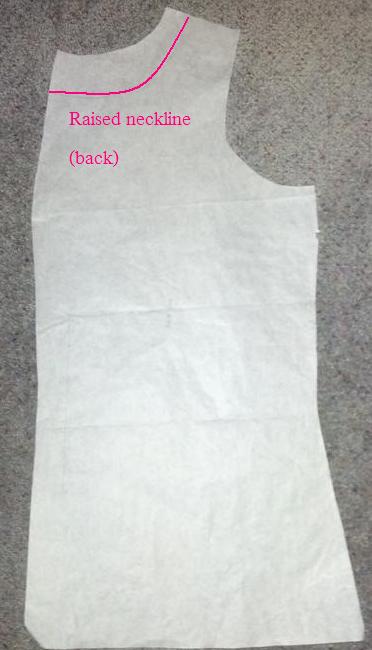
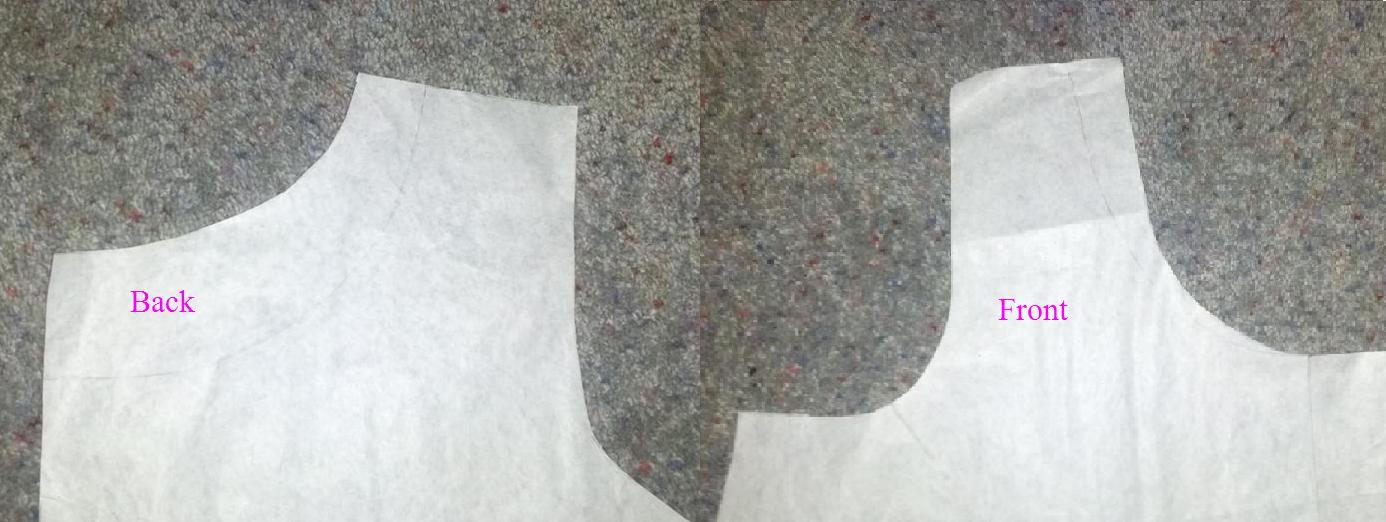
Once I'd made this up in my first fashion fabric, I found that the neckline was wider than I liked and also lower at the back than I would prefer for work tops. So for my second version, I altered the neckline by raising it at the back by 5 cm and at the shoulders by 2 cm. I didn't alter the front neckline at all, as this was perfect already!

Neckline alterations (front and back)

Neckline alterations close up
Finished tops to follow shortly :)

Thursday, November 8, 2012

Sewing Sorbetto


After seeing so many beautiful Sorbetto tops on the blogosphere, I've wanted to make my own version for some time now.

It's hard to believe that it was released as a free pattern a little over 1 year ago in May 2011 from the awesome Colette Patterns. There are so many inspirational Sorbetto versions out there (head over to my Sorbetto inspiration board on Pinterest to see what I mean) and it's hard to not be inspired by them - there's even a free sleeve pattern to vary it further! It's such a versatile pattern and can be tweaked to create many variations. It was also voted as #2 in Pattern Review's Best Patterns of 2011. In short, it's a winner!

I've been altering this pattern for a few weeks now and I think I'm pretty close with completing all the necessary adjustments. It's a simple silhouette but I wanted to focus on fabulous fit, so I've made 2 toiles and countless tweaks. I should have my first pattern adjustment post this weekend, so stay tuned!

P.S. Welcome to my new blog url. I've been shifting posts from my old blog to here and re-focusing the content. I hope you enjoy the ride!

Tuesday, October 12, 2010

Back to RJs I went

So, it turns out that I didn't buy enough hair canvas and the shoulder pads were WAY too big. So I went back to RJs today to get some extra supplies (oh and stay tape as I forgot that yesterday, although I'm not 100% sure about it - should it be twill tape? It's not very firm).


So once I had all my bits and pieces, they wrapped up my purchases in brown paper (this is what they normally do) but then they also tied it up with string! It even had a little loop "handle" so I could carry it. What a lovely experience! I think I was grinning to myself all the way back to work. In fact, when I saw it on my desk all afternoon I kept wanting to sing "brown paper packages tied up with string, these are a few of my favourite things!"

I should probably add the sleeves to my muslin and pre-wash my fabric ... I'm getting sooo behind!!

Photos of the package contents to come!

Thursday, October 7, 2010

Lady Grey ... progress in planning

Ok, so I have an almost completed muslin, I have fabric, lining and buttons. The last items on my list are the tailoring supplies! Yikes, I've seen the first few parts to the tailoring of this coat. Handbasting with hidden stitches - yikes! I mean, I've done blind hemming by hand but I'm worried my stitching will show up. Only one way to find out! So in order to prep for this stage, I need to go and pick up the following:


  • 1 metre of 60" wide hair canvas
  • 2 metres of weft interfacing (is this like whisper weft?)
  • Black silk thread
  • Beeswax
  • 1 metre of pre-shrunk muslin (for the back stay)
  • 1/4 metre black silk organza (for the bound button holes)
  • Shoulder pads


I don't actually know what some of these are, so I'm hoping RJs can help me out with them all!

Monday, October 4, 2010

Pants ... almost but not quite

I spent some of Saturday working on my Lady Grey Muslin and then spent Sunday trying to finish of a new pair of black pants. I just needed to re-shape the leg, as they a bit too wide, add a button hole and button and then hem them. I now only have the hemming to go but have decided to complete it tomorrow because I'm a bit too sleepy for blind hemming by hand. I will post the completed pics tomorrow.

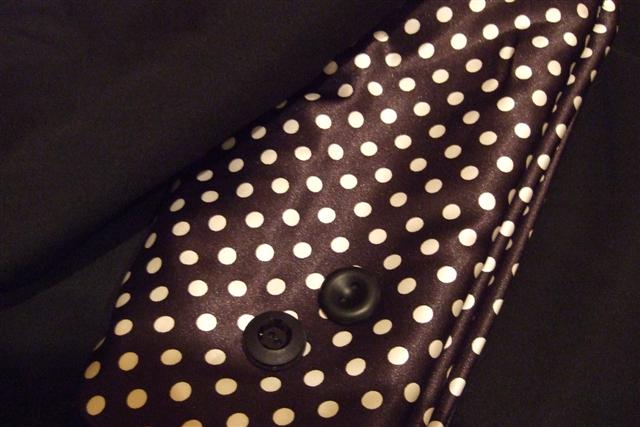
In the meantime, here is my Lady Grey fabric (I've always wanted a jacket with a polka dot lining!):


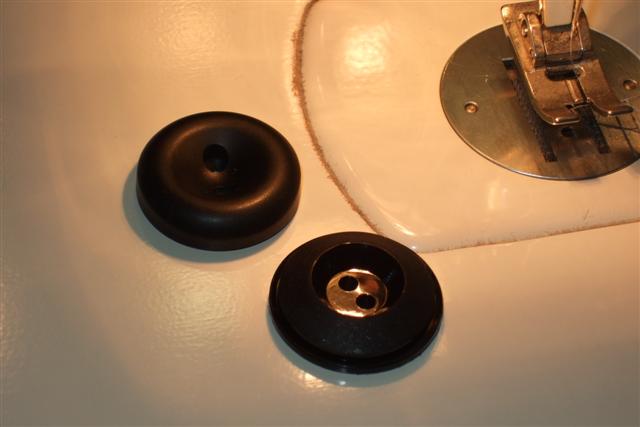
I have the fabric choosen but now I need to select my buttons. I choose 2 different ones in the shop but I think I'm leaning toward the more matte one. Thoughts??


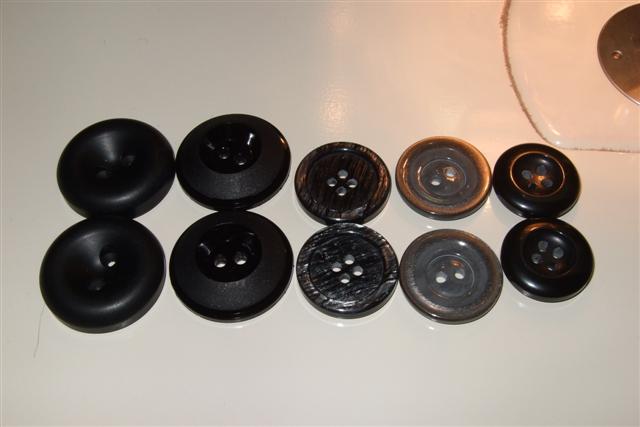
Oh and here are all of the buttons I picked up!

Saturday, October 2, 2010

A giveaway (not mine)

Head on over to The Long & Winding Bobbin blog to read not only an awesome blog but also about her giveaway.

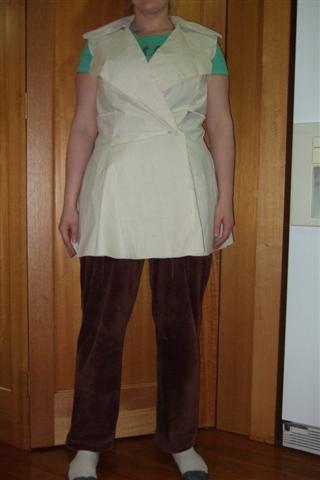
And to complete my entry, here's what I'm working on - my Lady Grey! More muslin pics and fitting info to come.

Plus I'm wearing some pj pants I made about 1-2 years ago using some awesome 1970's mission brown velour from my mums stash. They are affectionately called "Monkey" pants in our house as my mum made a monkey costume from the same material when we were kids. And there's still about 6-8 metres left, after 1 monkey costume and about 3 pairs of Monkey pants!

Wednesday, September 29, 2010

Playing catchup

So the last week and a half feel like I haven't progressed on my Lady Grey because I've been sick with tonsillitis - not fun. I'm on the mend now but still have some catching up to do. I would say my muslin is maybe 40% complete (no sleeves or collar on there yet) but I should hopefully get it finished this weekend.

For those playing along at home, there are some more posts on Gertie's site so instead of adding them here I'm going to create a Page with the links and just keep updating them there. I will also include the dates that she posted about how we will progress each week.

On my to do list:
* Get tailoring supplies. I've decided to go for the tailored option as this is a good chance to learn some new skills but I need to head to RJs with my supply list (not sure yet how much I need)
* Finish Muslin. I ended up slashing my main pieces using the notches in the back pieces as a guide, which I will blog about when I get the chance. I measured my back length and my teacher says my length is about 6cms longer than the "pattern average" so I added 8cms to give me some room to move (it's easier to remove than add) and also drop the waist because I'm short-waisted, proportionally to my legs. I might need to lengthen the sleeves too but I'll wait on doing that.
* Pre-treat fabric. As I discussed here I've decided to make my coat with the Cavalier Garbardine from Spotlight and I also bought some satin fabric which is white with black polka dots - just what I was after!

On a more general sewing note, I've been thinking a whole lot more about what's missing from my wardrobe and will blog about that soon. My mind is spinning with different thoughts at the moment!

Thursday, September 16, 2010

Lady Grey is in the building!

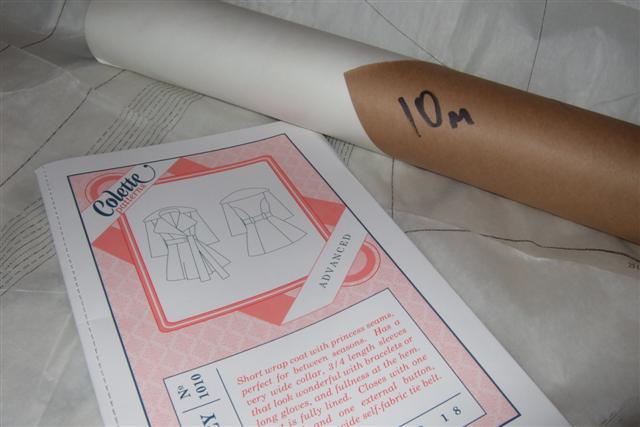
So, come Monday night I was pretty tired - so much so that I couldn't be bothered to even go out the front to get the mail. I convinced myself to go out and grab them and was greeted by a package with the all knowing "Clothing patterns" listed on the customs form. I was barely inside before I tore open the package to find my awesome Lady Grey pattern (along with Nutmeg and Cinnamon!). I think I jumped for joy when I saw them!

The packaging is totally cool! It's a little booklet with a pocket in the back with the pattern sheets. The book is even stitched into the envelope. Like I said, totally cool!


Note: my pattern tracing paper is from RJ Harvey in the Nicholas Building on Swanston St (Melbourne). It is a nice weight but I found it a bit tricky to trace the Colette pattern because the ink is not really dark.

So I finally got some time to trace off the pattern pieces (all 14 of them) tonight. 2 hours later and they are finally all traced! I will probably cut them out tomorrow and then sew them up on the weekend.

I've been reading all of Gertie's posts so far (links below if you need to catch up) and have also been reading all the questions and comments on each post. I've decided to go with the tailored option so will need to go and get some supplies from RJ Harvey.

Links from Gertie's blog (so I don't need to keep hunting for them and so you can catch up):
* Colette Patterns Lady Grey Sew-Along announced!
* 20% off the Lady Grey pattern
* Join the sew-along - get your own badge!
* Meet the Lady Grey designer
* Fabric selection help
- I'm planning on using Cavalier Gabardine in black from Spotlight. Whilst my dream Lady Grey would be in a teal or turquoise colour (inspired by Tasia - this was the post that took me from Lady Who? to Lady ooooohhhhhhh! I have been coveting this pattern since then) I've decided to start with a basic black
* Gather your muslin materials
- I have a roll of calico that I can use for this, so I think I'm all set.
* Cutting vs tracing
- I traced, see above.
* Sew-along materials list
- I need quite a bit on this list. RJs, here I come!
* Making the muslin!
- I need to decide if I need to lengthen the coat before or after the first muslin. But there are no shorten / lengthen line. Yikes! Off to ask Gertie!

Tuesday, September 7, 2010

Gertie's Lady Grey Sew-Along - I'm in!!

I'm so excited about this ... I've finally ordered my pattern (and I'm praying to the mail pixies that it gets here soon!) and I'm committed to the sew-along!

If you head over to Gertie's Blog you will see that sewing hasn't commenced as yet (muslins to be started next week) but there is already some great info about choosing fabrics and what you need for your muslin.

If you haven't joined already, come along and join the fun! There's nothing like a group of co-conspirators to help you to complete a project and I can't wait for the tips and tricks that Gertie has up her sleeves for this.

Oh and go and check out http://www.colettepatterns.com/ - they are just stunning!